About
Shop
FAQ
Freebies
Gallery
Grow Superfoods – For Pennies – In Tiny Spaces!
Vegetables, especially greens – the darker the better – are arguably the healthiest foods on the planet, and you can grow enough to feed your family in a very small space, with costs literally only pennies for a family meal.
What are superfoods, and why are they so important – Dark green leafy vegetables such as kale, Swiss chard, spinach, collards, bok choy, mustard, romaine lettuce, turnip and beet greens, arugula, carrots, including the tops, watercress, and microgreens are important as:
- Great sources of nutrition, including vitamins A, B, C, E, & K, as well as iron, magnesium, potassium, and calcium.
- High in antioxidants, thus helpful in preventing cancers and heart disease.
- Low in calories and fat, and low glycemic index, helping with weight control and type 2 diabetes.
A good article by the Grand Forks Human Nutrition Research Center details the nutrition they provide and the many health benefits of dark greens here – https://www.ars.usda.gov/plains-area/gfnd/gfhnrc/docs/news-articles/2013/dark-green-leafy-vegetables
Where and when to grow your superfoods – Because these vegetables are hardy or semi-hardy they can be started in the garden 2-3 weeks before the average date of last frost in the spring, and harvesting can continue for several weeks after the first fall frost as well. Combined, these factors can increase your harvest time by as much as 2 months as compared to warm-season crops!
In addition, they all grow to harvestable size quickly, so that you can be eating them within 3 to 5 weeks of planting. And by removing one or two outer leaves every week they will provide a continuous harvest for many months throughout the growing season (more about this below).
And for fresh greens in the winter months, or if you have no garden space at all, you can grow microgreens on a countertop in your kitchen in only 2 weeks! A good source of sprout and microgreen seeds is True Leaf Market in Salt Lake City, Utah – https://trueleafmarket.com/collections/microgreens-kits-and-supplies
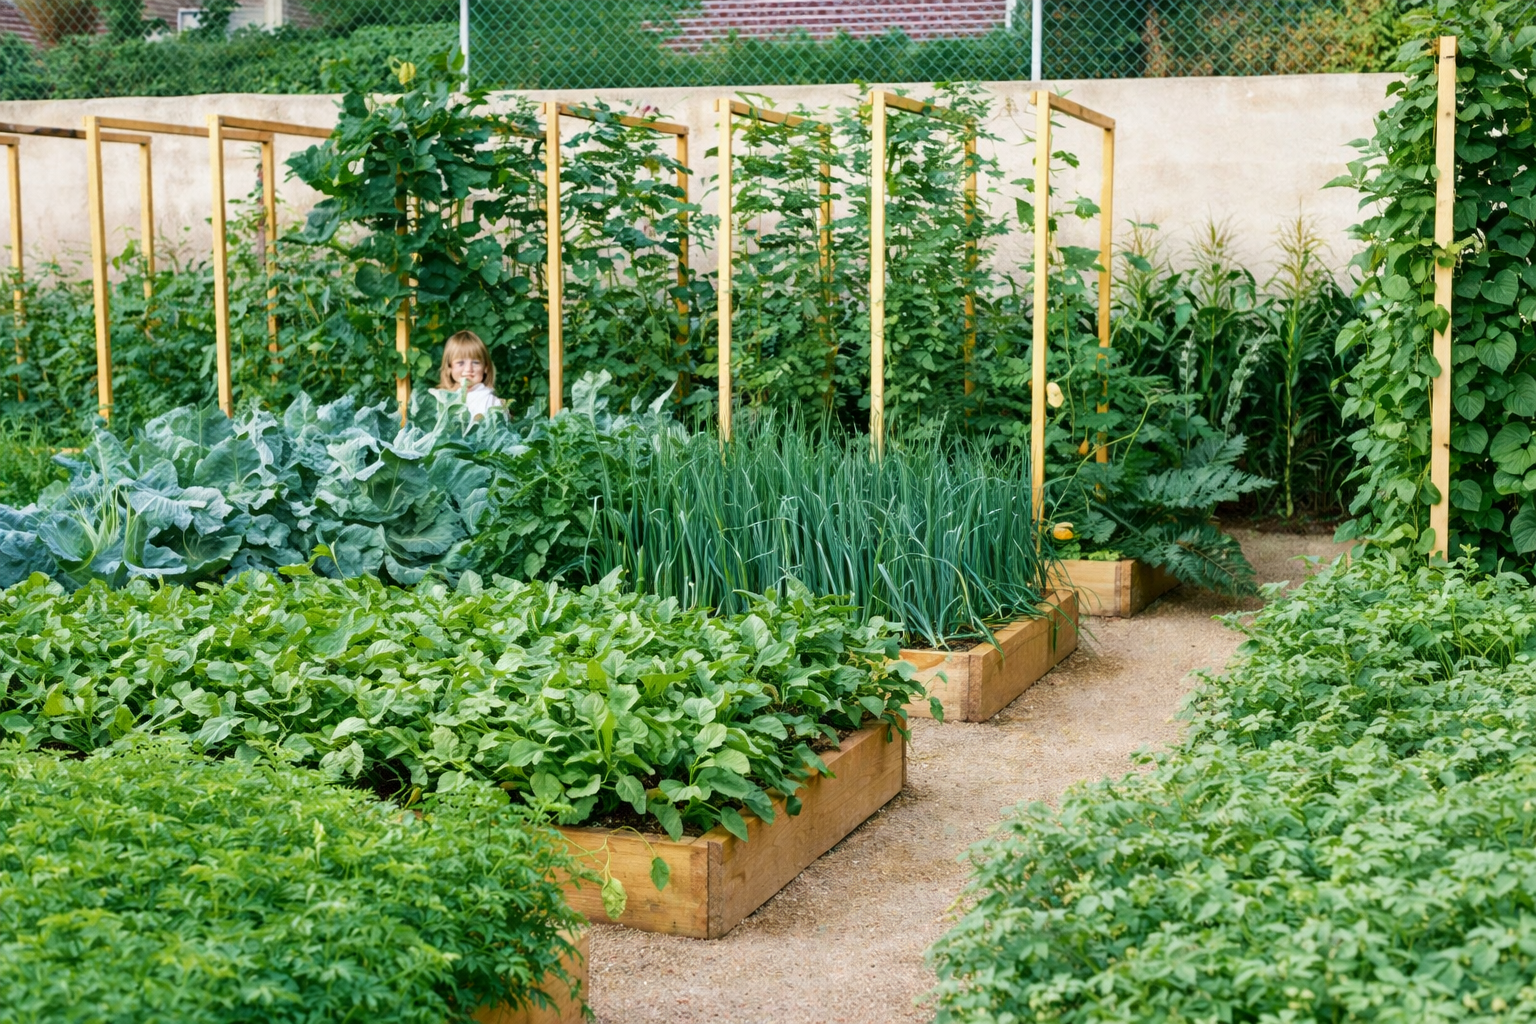
How much space is needed, and how many plants do you need to grow – An important feature that makes these vegetables so valuable is that with most of them a single plant – if harvested timely and properly – will continue to produce throughout the growing season. Just remove one or two outer leaves each week from the plant and it will grow new leaves for months! If you neglect to remove leaves as described the plants will produce a seed stalk and seeds, and your harvest will soon be finished.
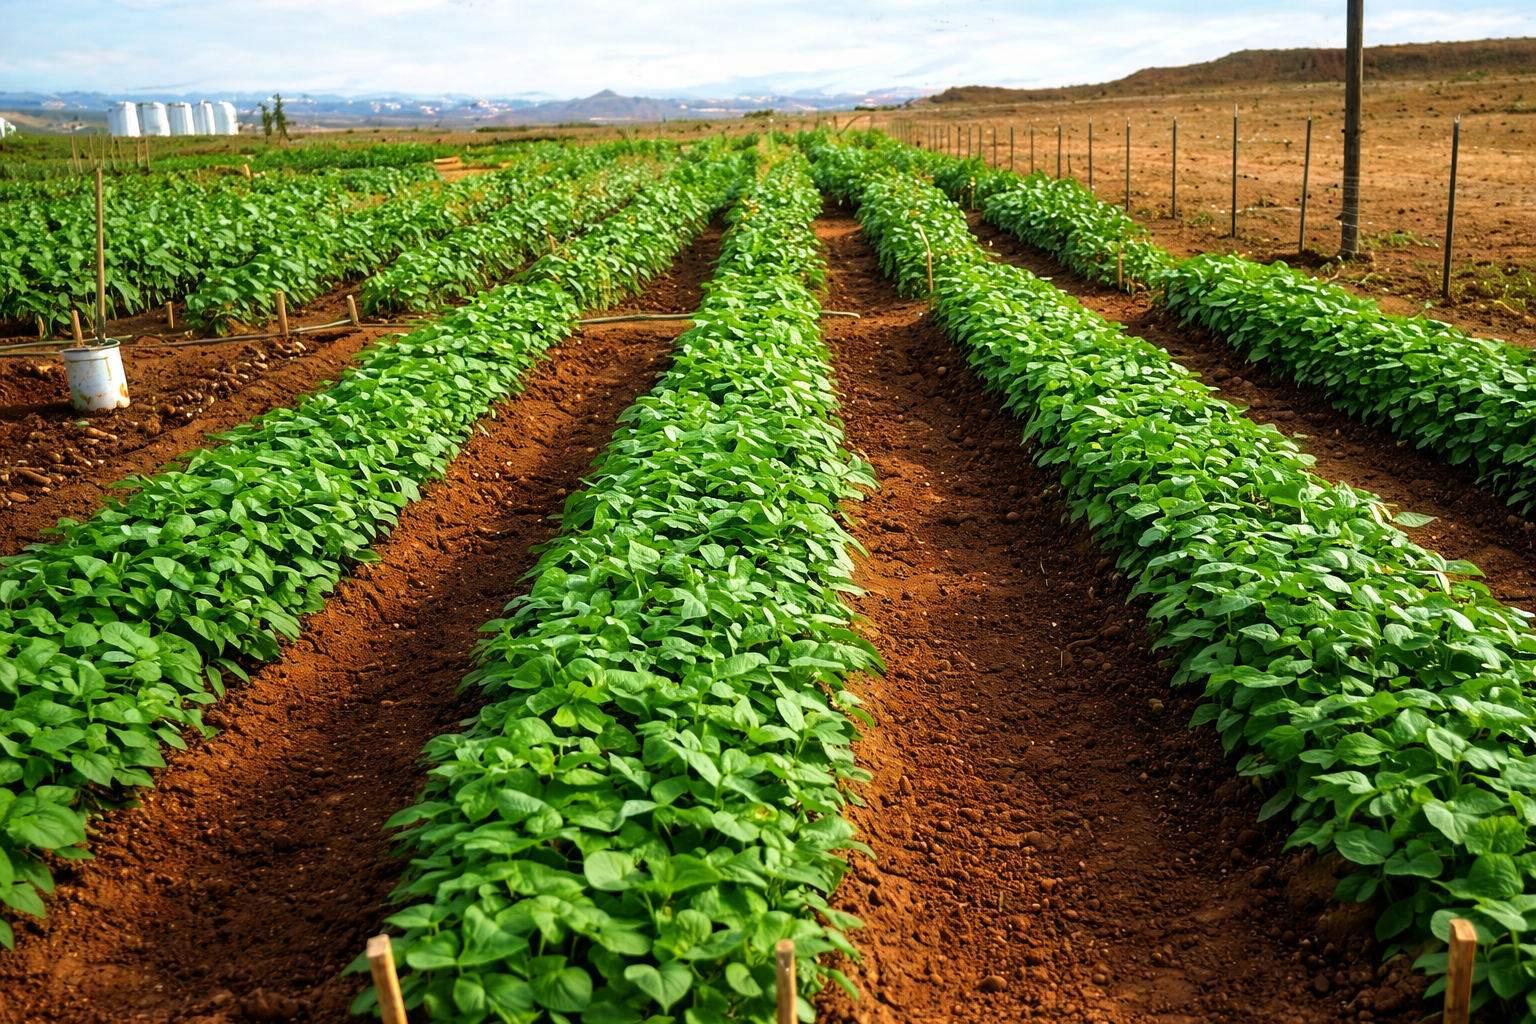
This means that just a few plants can feed you for the entire growing season. For example, 6 each of kale, chard, collards, and romaine lettuce plants, and 16 each of turnips and beets need just 24 square feet of garden space. Do-able? That’s only 1/1,815 of an acre!
Recommendations for the best sustainable way to grow your superfoods –
Buying six-packs of seedlings from a reputable nursery will save you time and effort, but get them early, before they get root-bound and leggy! Those plants are NOT what you want, and will lead to crop failure. Producing your own seedlings can be done on your own schedule, and allows for choice in varieties, but requires some time, effort, knowledge, and a small investment in facilities and materials.
I have prepared a presentation to teach you what you need to know in order to grow your own seedlings. It’s free and it’s located at – https://growfood.com/learn/
I recommend everyone take advantage of the substantial health benefits, and the financial savings to be gained from growing and eating the healthiest foods on the planet.
Healthy Eating!
Jim Kennard
© Copyright 2025 – Food For Everyone Foundation
Sustainable Gardening – Propagation Can Be Simple And Fun
3Propagation Can Be Simple and Fun – AND Give You VALUABLE Plants!
Have you ever wished you could grow sweet, fresh pineapples like those great Del Monte ones you can sometimes find in the stores? How about bananas or other tropical delights – wouldn’t it be fun to grow your own, right in your back yard?
There are certainly some limitations, but not as severe as most people think. Let me give you a few ideas to get your imagination going:
Traditionally, pineapple is grown from cuttings from old growth. The crown or growing tip is left in the field until it dries out, then it’s harvested and stuck in newly prepared soil to grow again. This method requires 18-24 months to produce new fruit from the old material.
How about trying a different approach, which you can do with the pineapple you buy at your local store? Just break off the top and prepare it for immediate planting in your greenhouse or other warm space with ample sunlight. Here’s how:
With your fingers, take off the green fronds nearest the broken end for about one inch (2 1/2 cm), leaving the stalk exposed. Place in a 4″ pot or tray of pre-moistened sawdust/sand mixture that has been prepared for planting seedlings, with Pre-Plant and Weekly Feed mixes included at 1 1/2 ounces and 3/4 ounces per 1/2 cubic foot of soil.
Water regularly to maintain soil moisture with clean water until roots appear, then use the constant feed solution of 1 ounce Weekly Feed for 3 gallons of water for every watering until plants are placed in the garden – about 4-8 weeks, depending on your growing conditions inside and in your garden. You should have a strong, healthy root structure by the time they are planted into the garden.
Transplant into the garden only after all danger of frost is past and the soil is warm. Apply Pre-Plant and Weekly Feed to the soil before transplanting into the garden. Feed weekly with Weekly Feed until 8 weeks before harvest.
If nights get cold before the plants reach maturity, cover them with greenhouse plastic using the “mini-greenhouse” frames shown in the Mittleider Gardening Course book – https://growfood.com/shop/the-mittleider-gardening-course/. Apply heat as needed to avoid any possibility of frost, and keep the plants from going dormant.
This simple process changes the time needed to grow mature pineapples from 18+ months to 8 months! Sweet potatoes’ growing times can be reduced from 10 1/2 months to 6 months or less, and other crops see similar improvement.
With those numbers, I hope some of you – especially in the warmer climates – will have the courage to try your hand at propagating plants. It can be both fun and rewarding.
Just remember that these plants are grown in the tropics for a reason, and make sure they have ample heat and sunlight, along with plenty of water. And always start with healthy propagation stock! Never expect or even hope to get healthy seedlings from diseased or weak plant materials.
What about propagating the plants in your traditional vegetable garden? Most vegetables mature so fast that propagating isn’t very practical. However, some folks like to propagate new plants from their tomatoes, and that’s easy to do by removing the sucker stems – gently to avoid bruising the root hairs that grow along the stem – and placing the stem in a tray or pot as described above. The problem with doing this is that the new plants will be substantially behind the parent plants, so unless you were planning on a later planting anyway, don’t bother.
Remember that tomato plants that are fed and cared for will continue to produce for more than a year if there is no frost, so you don’t need to plant a new set of plants for a second crop.
Budding and grafting trees is also very interesting, and can help you improve your orchards, however that article needs more space than we have here, and will have to wait for another day.
Enjoy!
Jim Kennard
Prepare Now For Next Spring’s Garden
Winter’s the time to get ready to grow your own seedlings! It’s not really difficult, and can extend your growing season by many weeks. For example, by planting cabbage, broccoli, and cauliflower in February in your basement under grow-lights, you can put large, sturdy transplants into your garden by the end of March or early April, and be eating them when others are just seeing them come up!
Remember that photosynthesis, using light, heat and moisture causes plant growth. Therefore you must follow a few key natural principles very carefully, or you will be disappointed.
First, seeds must have moisture to germinate and grow. And the soil mix must be moist, but not soggy, or you’ll drown the new plant, since it must also have oxygen!
Second, while heat is essential, temperatures must be maintained in a narrow range for ideal germination to occur. Most vegetable seeds germinate quickly between 75 and 80 degrees Fahrenheit. After plants are up, many of them will grow in cooler temperatures, but most all will become dormant (stop growing) at temperatures below 50 degrees.
Third, light is not necessary for seed germination, but as soon as your seedlings begin to emerge from the soil, maximum light is required immediately for proper development. Therefore, to grow in your house, make sure your plants have a strong (but not hot!) light source directly on the plants, for up to 16 hours per day. Note the pictures of two grow-light shelves in the Gallery Section. The metal one is 6-shelf Commercial Chrome Shelving, from Sam’s Club costing only $70, and will hold 20 flats of plants. Suspend shop lights with 2 cool and 2 warm 40-watt tubes 4 to 6″ above the plants, or use more efficient LED grow-lights .
The fourth principle relates to feeding. A balanced nutrient mix of 13 minerals is essential to plants immediately after germination. Those nutrients are mineral salts and must be very dilute in the soil moisture, otherwise osmosis will cause the salt to draw the life-giving moisture out of the plants, and they will die. To ensure you never burn your plants, water seedlings daily using the “Constant Feed Solution” of one scant ounce (2 almost level tablespoons) of Weekly Feed dissolved in 3 gallons of water. To make the Weekly Feed Mix simply add one small packet of the Micro-Mix, which is available on the Foundation’s website listed below, with 4# of Epsom Salt and 25# of 16-16-16.
Next, it is important to separate your small plants before their leaves begin to overlap with others’, or the tiny stems will become very weak and spindly as the plants all stretch – looking for more light. By the time the plants have their first or second true leaf this step should be completed. Failure to act for even a few hours can result in spindly, weak plants, which sometimes never recover. Transplanting seedlings into 2″ 6-paks or pots will provide adequate space for them to grow an additional 2-3 weeks, depending on variety. If it’s still too early to put them out into the garden by the time plant leaves are again beginning to overlap, prune the leaves, transplant again into larger pots, or separate pots, so the plant leaves always have maximum light.
Before transplanting into the garden, “harden-off” your plants outside, off the ground for 2 to3 days, to acclimate them to direct sunlight, temperature, wind, etc. This is important so the plant doesn’t have the shock of a new environment added to the shock to its root system caused by transplanting. If the weather turns cold at night, bring the plants back in the house. The temperature adjustment needs to be gradual.
For many of your plants, the pruning process does double duty. In addition to assuring maximum light, it shocks the plant mildly, causing it to pause in its growth and produce a thicker, sturdier stem. This process makes the plant much better able to endure the vicissitudes of the outside environment, such as cutworms, ants, etc. that often quickly decimate plants with weak, spindly stems.
For tall-growing plants, like tomatoes, be sure to provide small stakes tied to the plant stem, to prevent them from falling over. And with tomatoes, begin immediately to remove all sucker stems as soon as possible, to assure a single, strong stem and maximum production from your plant.
Great growing instructions can be found in the book Let’s Grow Tomatoes, available as a digital download and as a part of the Mittleider Gardening Library CD. It’s available at www.growfood.com/shop.
Prepared – Got Your Wheat, Beans & Rice? So What Are You Going To Eat?!
As we try and stay warm during this cominf cold winter season probably very few of us are thinking of gardens or growing our own food – but maybe we should be! When God cursed the ground it was for our sake, so when He said we were to eat our bread by the sweat of our brow perhaps He was pronouncing a blessing on us. At the very least it was instruction on how we were to live, but today too many of us , if we exercise at all, pay to “work out” in the gym instead of working out in the garden.
It is time to change that!
Great and wise men have said every family should have a garden, and that we should “Grow all the food that you possibly can on your own property…grow vegetables and eat those grown in your own yard. Even those residing in apartments or condominiums can generally grow a little food in pots and planters.” Spencer W. Kimball
Evidence all around us points to the wisdom of those words. Today much of what we eat comes from places we know not and contains things that sometimes harm us. And a diet of fresh vegetables and fruits would eliminate many of the chronic health problems plaguing our society
I suggest now is a good time to begin preparing for your own garden next spring. Why? Because it makes sense to follow wise counsel at any time, but also because like someone recently said, when times get tough you’re not going to want to live just on rice and beans and wheat.
In talking with a motivated Mittleider gardener I asked how he became interested in gardening as an important component of his family’s preparedness regimen, and his answer was both humorous and instructive:
“Years ago my wife and I were going over our Preparedness list, basically taking an inventory of where we were in the process, and I asked her “what are we going to eat”, to which she replied “well, we’ve got wheat, beans, and rice . . . “. I thought about that for a few seconds and then said “so what are we going to eat”? She repeated “we’ve got wheat, beans, and rice”, and I responded again “so, what are we going to eat!”
“As we talked about this we decided that we really needed to have an on-going, fresh and sustainable source of nutritious food if we hoped to maintain any degree of long-term health and activity, and so we determined that we had to get serious about growing a garden.”
And here’s “the rest of the story” as Paul Harvey would say. His wife became a Certified Master Gardener, and for 30 years she worked diligently at trying to grow food for their family. However, until recently their success was very limited, even though they tried every method they could find. Their amazing success sfter finding the Mittleider Method of gardening is truly inspiring, and it is documented in some excellent short instructional videos at http://www.ldsprepper.com. I recommend you go there and see for yourself what they’ve done (and what you can do) in the back yard of a small lot in a gated community, with homeowners’ association rules dictating what your yard can look like.
So, what CAN we do in the winter in order to be prepared when it comes time to plant our gardens? Let me describe several important things you can begin doing immediately:
Certainly, planning next spring’s garden is important. And the Garden Planting Details Schedule lists most all of the common garden vegetables and then gives you valuable information in 14 categories including when to plant, where to plant, how far apart to plant, whether to plant seeds or seedlings, how long you can harvest, how much yield to expect, and 8 other important categories of information to guide your decisions. This is available free in the Files section of the gardening groups listed below, as well as in appendix B of The Mittleider Gardening Course book.
Other important areas of planning you should be covering this winter include ways to lengthen your harvest time, and this can be accomplished by growing your own seedlings, and by protecting your plants in the garden.
Seedling production is surprisingly simple, but requires following closely the basic laws of plant growth. Soil temperatures must be in the 70-85 degree range for optimum germination and growth; maximum light must be applied immediately upon emergence; soil must be damp but not soaking wet; and plants must be fed a balanced nutrient mix on a regular schedule – preferably with every watering.
Protecting your plants from the cold (and heat in mid-summer) can be done simply with hoops and clear greenhouse plastic immediately over the plants (low tunnel), or using something larger, again with hoops and plastic sometimes called high tunnels. A third way, costing more but allowing you to grow crops vertically and increasing yields by 4-6 times in a given space, is what I call the in-the-garden greenhouse. These are built using a set of T-Frames tied together by 2 X 4’s and again covered by clear greenhouse plastic, and they can be used to grow seedlings in late winter/early spring and then to grow ever-bearing crops clear into the next winter. Gardeners in southern-tier states even use them to grow successfully year-round.
A family of 4 can live out of a garden of less than 1/20th of an acre! So start planning and preparing now, and expect to have your highly productive sustainable garden in place and growing by the time your neighbors begin even thinking about their gardens.
Short videos demonstrating many steps in the gardening process are available free at. Start there, and if you feel you want to join one of the Food For Everyone Foundation’s free gardening groups to learn more and share with others, simply go to either https://groups.yahoo.com/neo/groups/MittleiderMethodGardening/info or https://www.facebook.com/groups/2304852529528161/
So, what are YOU going to eat when the stores are all closed? If you’re serious I will give you some very exciting and important details next time.
Invite Spring Early – Grow in Your Basement
Now’s the time to get ready to grow your own seedlings! It’s not really difficult, and can extend your growing season by many weeks. For example, by planting brassica’s (cabbage, broccoli, and cauliflower) in February in your basement under grow-lights, you can put large, sturdy transplants into your garden by the end of March or early April, and be eating them when others are just seeing them come up! However, remembering that photosynthesis, using light, heat and moisture causes plant growth, you must follow a few key natural principles very carefully, or you will be disappointed.
First, seeds must have moisture to germinate and grow. And the soil mix must be moist, but not soggy, or you’ll drown the new plant, since it must also have oxygen!
Second, while heat is essential, temperatures must be maintained in a narrow range for ideal germination to occur. Most vegetable seeds germinate quickly between 75 and 80 degrees Fahrenheit. After plants are up, many of them will grow in cooler temperatures, but most all will become dormant (stop growing) at temperatures below 50 degrees.
Third, light is not necessary for seed germination, but as soon as your seedlings begin to emerge from the soil, maximum light is required immediately for proper development. Therefore, to grow in your house, make sure your plants have a strong (but not hot!) light source directly on the plants, for up to 16 hours per day. Pictures of two grow-light shelves can be seen in the Photos section of the free gardening group at MittleiderMethodGardening@yahoogroups.com. The metal one is 6-shelf Commercial Chrome Shelving, from Sam’s Club costing only $70, and will hold 20 flats of plants. Suspend shop lights with 2 cool and 2 warm 40-watt tubes 2 to 4″ above the plants.
The fourth principle relates to feeding. A balanced nutrient mix of 13 minerals is essential to plants immediately after germination. Those nutrients are mineral salts and must be very dilute in the soil moisture, otherwise osmosis will cause the salt to draw the life-giving moisture out of the plants, and they will die. To ensure you never burn your plants, water seedlings daily using the “Constant Feed Solution” of one ounce (2 level tablespoons) of Weekly Feed dissolved in 3 gallons of water. For the Weekly Feed formula, go to Lesson 5 of The Mittleider Gardening Course book – www.growfood.com/shop
Next, it is important to separate your small plants before their leaves begin to overlap with others’, or the tiny stems will become very weak and spindly as the plants all stretch, looking for more light. By the time the plants have their first or second true leaves, this step should be completed. Failure to transplant them now, even waiting a few hours can result in spindly, weak plants, which never recover. Transplanting seedlings into 2″ 6-paks or pots or into 18″ by 18″ Flats or trays will provide adequate space for them to grow an additional 2-3 weeks, depending on variety. If it’s still too early to put them out into the garden by the time plant leaves are again beginning to overlap, prune the leaves, transplant again into larger pots, or separate pots, so the plant leaves always have maximum light.
Before transplanting into the garden, “harden-off” your plants outside, off the ground for 2 to 3 days, to acclimate them to direct sunlight, temperature, wind, etc. This is important so the plant doesn’t have the shock of a new environment added to the shock to its root system caused by transplanting. If the weather turns cold at night, bring the plants back in the house. The temperature adjustment needs to be gradual.
For many of your plants, the pruning process does double duty. In addition to assuring maximum light, it shocks the plant mildly, causing it to pause in its growth and produce a thicker, sturdier stem. This process makes the plant much better able to endure the vicissitudes of the outside environment, such as cutworms, ants, etc. that often quickly decimate plants with weak, spindly stems.
For tall-growing plants, like tomatoes, by the time they are 12″ tall, provide small stakes tied to the plant stem to prevent them from falling over. And with tomatoes, begin immediately to remove all sucker stems as soon as they appear, to assure a single, strong stem and maximum production from your plant.