About
Shop
FAQ
Freebies
Gallery
Free Vegetable Gardening Seminars – Tips & Techniques to Turn a Weed Patch into the Garden of Eatin!
I am delighted for the opportunity of presenting free ½-day vegetable gardening seminars again this winter and next spring to groups who request them. My availability is necessarily limited, and timing is critical, so get your church, community, or gardening club involved now!
Seminars include 2+ hours of fast-paced video instruction in the classroom, and 2+ hours of demonstration and practice in the garden. Your group will learn the unique world-renowned Mittleider Method of vegetable gardening that’s been called “the best of organic”, “better than organic,” and “the poor man’s hydroponic system,” and that promises you a great garden in any soil and in virtually any climate.
Whatever size garden you have to work with – whether 100 square feet or one acre; whether on a patio, in containers, or in the dirt; and whether it’s organic, or even hydroponic, you will learn to solve your unique problems and improve your gardening success. And you’ll enjoy gardening for a change!
You’ll learn tips and techniques for maximizing your limited space – eliminating weeds – using less water more efficiently – increasing yields – improving quality – extending your growing season – and minimizing problems with bugs and diseases.
Next summer you can eat fresh garden-grown tomatoes almost as soon as others are getting theirs established and growing in the garden! And you can still be enjoying them in December, long after your neighbors are paying top prices for “plastic” store-bought varieties. And you don’t need expensive greenhouses or hydroponic equipment to do it!
Dr. Jacob Mittleider developed these methods specifically for family gardeners all over the world. And we keep the procedures simple and the costs down, so that families, whatever their financial situation, can grow their own food and achieve health, self-sufficiency, and independence, while enjoying the experience.
You’ll want a large group (50-100 minimum) and a tilled garden space near the classroom (2-3 minute drive maximum), to assure the maximum benefit for all participants.
Email the Foundation with the details of your request at jim@growfood.com, or call 801-915-4449 or 888-548-4449. Let’s make 2020 the best, most productive, and most enjoyable gardening year you’ve ever had! i had great results with my husband when i use Tadalista wich i received from http://buymdonline.com/tadalista/ i bought generic tadalafil under brand name Tadalista, guys ship medications from India
Meanwhile, if you live too far away, or can’t get a large group together, you can get most of the benefits of an in-person seminar by ordering the Gardening Seminar DVD , or the Mittleider Gardening Library CD from the Foundation at https://growfood.com/shop. And if you don’t already have it, the latest edition of The Mittleider Gardening Course book is 304 pages – all in color, with 150 great garden pictures and dozens of illustrations – of the best gardening book on the planet. Get yours now!
Simple Mini-Greenhouses for Containers and Soil-Beds – Vegetable gardening, or Organic gardening
It’s not too early to begin preparing for early spring planting (it works for fall planting also)! By covering your containers, which we call Grow-Boxes, or Soil-Beds with “Mini-Greenhouses” using PVC arches and greenhouse plastic, you can be in your vegetable garden with cool-weather plants by the end of February or the first of March, and continue growing into November. They will warm the soil and protect your plants from light frosts. And with a little supplemental heat (small space heater) even hard frosts will not kill your plants. This is often enough to extend your growing season by several weeks in both spring and fall.
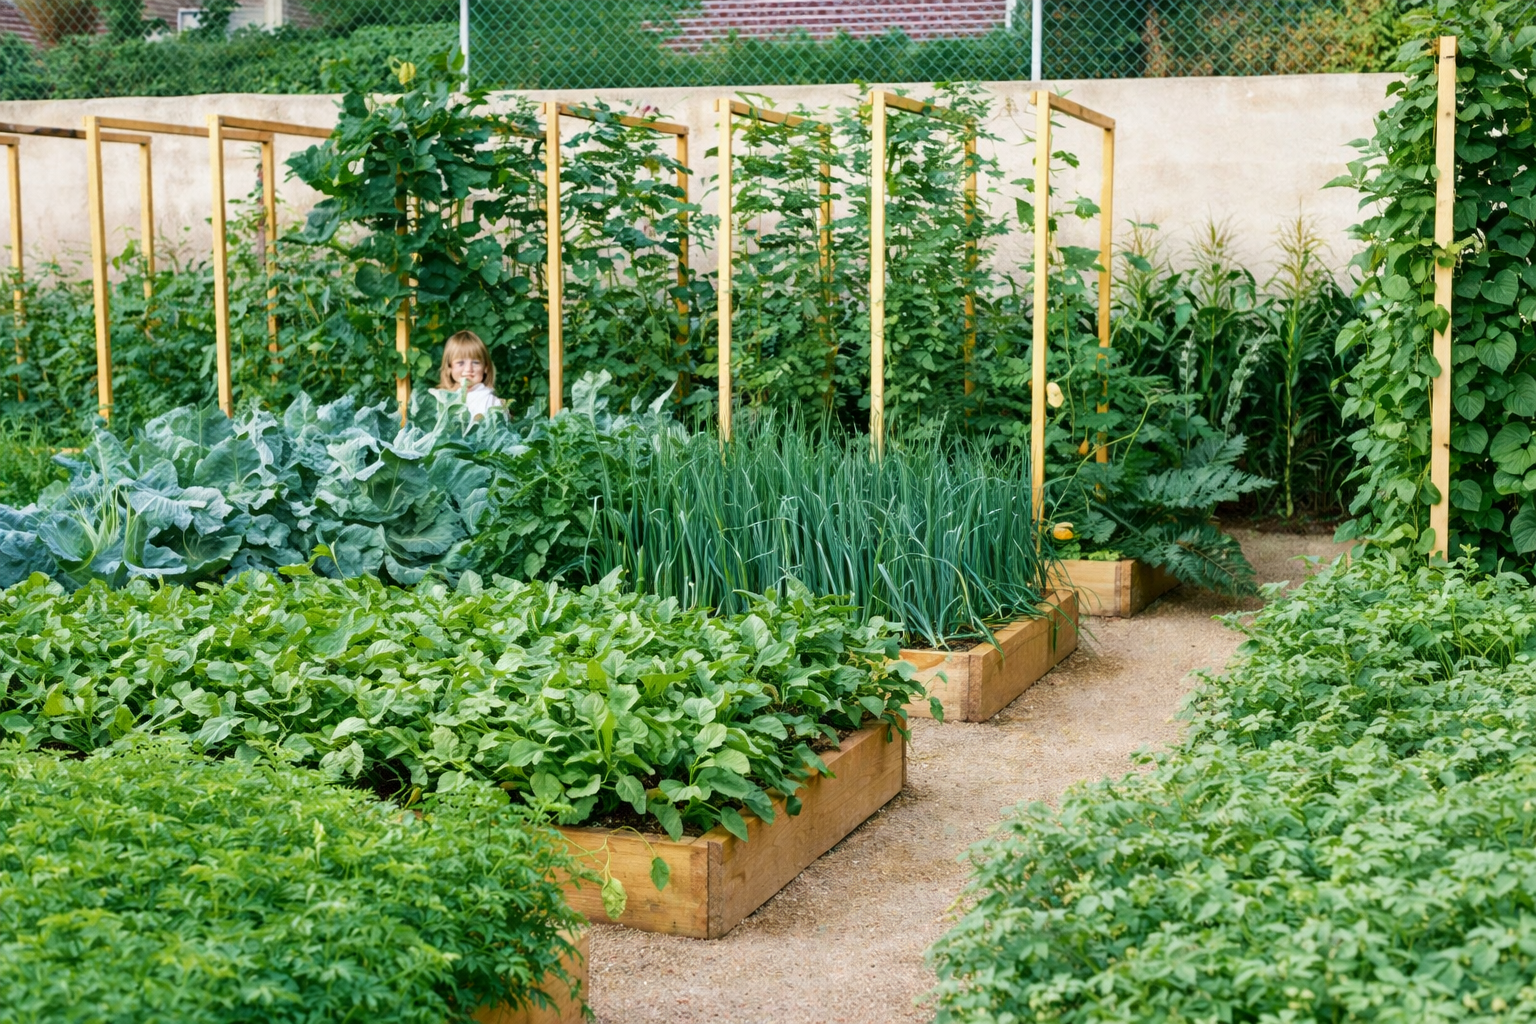
This process works great with organic gardens, container gardens, raised-bed gardens, or in plain old soil-beds.
Pictures can be seen in the Photos section of the free MittleiderMethodGardening Group on Yahoo Groups, or the Mittleider Gardening Group on Facebook. Invitations to join are on every page of the Food For Everyone Foundation website at http://www.foodforeveryone.org. The pictures show arches over Grow-Boxes, or containers. Following are instructions for building a jig and then making PVC arches for 18″-wide boxes or soil-beds.
Materials needed:
11 – 5′ lengths of 1/2″ Schedule 40 PVC pipe – to be placed 3′ apart in each bed or box to be covered.
6-mil greenhouse plastic – 5′ wide and 33′ long – one for each bed or box to be covered.
For Grow-Boxes only – 3 10′ lengths of 3/4″ Schedule 200 PVC pipe, cut into 24 15″ pieces for each box to be covered. Plus 22 2″ nails and a small 2″ X 4″ block.
One 30″ X 30″ sheet of plywood, plus 6 – 2 1/2″ nails.
One heat gun (to heat and bend pipe).
With a pen, make 3 marks at the top of the plywood sheet – one in the center, and one each, 9″ to the left and right of the center. Go down 9″ on the plywood and make 3 marks exactly corresponding to the first 3. Draw lines from the outside lower marks to the top center mark. Place marks on both lines 10″ up from the bottom. Go down 27″ from the top of the plywood and make 3 marks corresponding to the others. Draw lines between the 9″ and 27″ marks. Make marks 2″ up from the bottom of both 18″ lines. Drive nails into the 4 upper marks, leaving 2″ of nail exposed. Drive nails into the marks 2″ up from the bottom of the 18″ lines, then drive nails 1″ to the outside of these nails. This is the jig for bending the PVC pipe.
Cut 5′ lengths of 1/2″ schedule 40 PVC pipe. Mark them at 18″ and 28″ from each end. Place one end of PVC pipe between nails on one side, with the end at the 18″ mark (2″ below the first 2 nails). With heat gun, heat PVC pipe at each spot where PVC pipe encounters a nail, and carefully bend the pipe to fit the jig. Allow to cool before removing pipe from jig.
For Grow-Boxes, place 15″ pieces of 3/4″ PVC adjacent to the Grow-Box at each end and at 3′ intervals on both sides. With a hammer, and using the small 2″ X 4″ block of wood, hammer the PVC into the ground until the top is level with the Grow-Box. Drill a hole through the PVC pipe 2″ up from the dirt, and hammer the 2″ nail through both pipe and Grow-Box. Slip the 1/2″ PVC arches into the 3/4″ PVC holding pipes until they encounter the nails – about 6″ deep.
For Soil-Beds, just push the 1/2″ PVC arches into the ground at the peak of the ridge on each side of the Soil-Bed – again about 6″ deep.
Lay the 6-mil plastic over the entire box or bed, centered, with 18″ overhang on each end. Fold excess plastic to avoid a messy appearance. Place dirt on both sides and the ends of the plastic to hold it in place.
Whenever the weather is above 50 degrees, open the ends, and when it is above 65 degrees, lift the plastic from one side and lay it in the aisle.
You must watch carefully to ensure that it doesn’t get too hot in your mini-greenhouses. A thermometer in at least one bed is a good idea, in order to measure the temperature and make necessary adjustments. Note also that brassica’s (cabbage, cauliflower, etc.) can grow in cooler weather than the warm-weather plants. Tomatoes, corn, peppers, etc. must be near 70 degrees or above to do well.
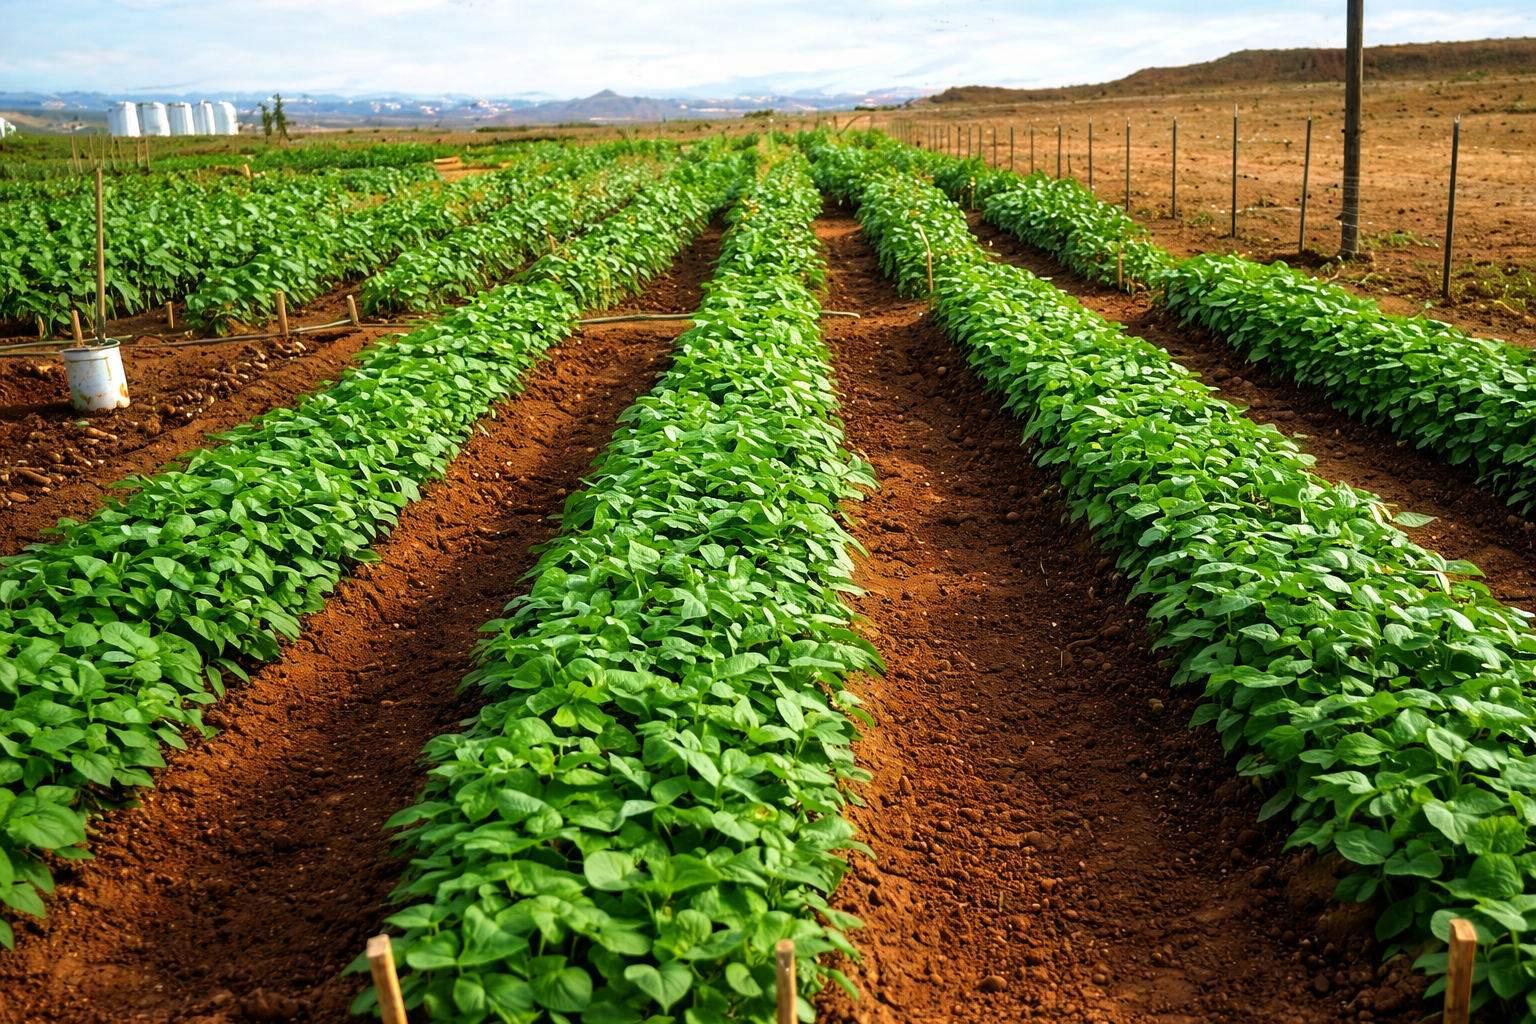
Container Vegetable Gardening – Size, Soil Materials, and Recommended Fertilizers
First off, you must have full sunlight and adequate water to have a successful vegetable garden, so find an all-day sunny spot with a good source of clean (not necessarily drinkable) water before you do anything else.
The next issue you’ll face is the details of how to build, level, fill and fertilize your containers.
Opinions differ widely regarding the answers to the following key questions about creating a container garden. The right answers, if followed, will go a long way toward assuring your success in growing a bumper crop of healthy and tasty vegetables.
1. Should top-soil be used, either by itself or mixed with other materials? 2. Should manure and compost be used for the planting medium or soil-mix? 3. What is the best ratio of materials to use for a container vegetable garden? 4. Is it important to use organic fertilizers in addition to the soil mix? 5. What size is best, in order to maximize yield in the minimum amount of space? 6. How deep does the container need to be to provide adequate space for roots?
- First of all, top soil is NOT recommended for use in containers, because it 1) is heavy, 2) is difficult to work with, 3) does not drain as well as other options, and 4) often contains one or more of the 3 “baddies” – disease, weed seeds, and bugs.
- Every gardener should also consider the following three issues very carefully before using manure and compost in containers, raised-beds, or any other type of vegetable garden, especially as the only or even the main ingredients in the soil-mix.
- As much as 95% of the composted materials available to the typical family gardener have NOT been sterilized, or even heat-treated in the composting process. And yet in order to have clean materials they must have been composted at 140 degrees or more for about 3 weeks, which is the time it takes to thoroughly compost organic materials aerobically, and that’s the only sure way to remove diseases, weed seeds, and bugs.
- In addition to the great potential for problems with disease, weed seeds and bugs, using manure and compost, even just for fertilizer, leaves you guessing as to what nutrition you are giving your plants. You never see the list of plant nutrients or their percentages on a bag of manure or compost, because no-one KNOWS what they are.
- And the third reason you need to be cautious about using manure/compost is that using them can often lead to a salinity problem and burn your plants. For example, applying 2″-3″ of manure to the planting area of a soil-bed or container adds 10#-15# of fertilizer salts all at once to the soil in a 30′-long bed or box. That’s more salt than the soil should have in an entire growing season! Imagine the effect of applying that much manure to the entire garden or worse yet, making it 25-50% of the entire soil mix, both of which are often done by enthusiastic organic gardeners!
3. Rather than using manure and/or compost in your container garden you will be wise to use two or more CLEAN ingredients for your soil-mix, including 30 to 35% sand (by volume) mixed with any combination of the following – sawdust, perlite, peat moss, ground-up pine needles, coconut husks, coffee hulls, rice hulls, or vermiculite – depending on cost and availability.
4. Plants cannot “eat” or even use animal excrement or compost. Both must fully decompose and their organic parts must revert to water-soluble inorganic minerals before plants can access them. Plants need small, measured and balanced amounts of 13 natural mineral nutrients dissolved in water and absorbed through the root hairs over the entire course of their growing cycle, rather than a large application of salts at one time.
For real success in your garden you must give your plants exactly what they need for sustained healthy growth. I recommend applying only about 7 OUNCES of mineral salts per week to a 30 foot-long bed or box, which is the amount applied weekly in a Mittleider garden.
Get the Mittleider Gardening Course book at www.growfood.com/shop to discover how to do it yourself – instructions and natural mineral formulas are all there.
5. Now briefly, let’s discuss ideal sizes for your containers. Any length is fine, depending on available space. But the width of both the container and aisles is important. You do not want to waste precious space in your garden, but plants need light and air, so the ideal width is beds of either 18″ or 4′, and aisles of at least 3′, and preferably 3 1/2′. Here’s why:
An 18′ width allows two rows of most plants, with room for light and air, plus feeding, watering, weeding, and harvesting between the rows. And a 4′-wide bed allows 4 rows of most plants or 2 rows of very large or climbing plants. Details on growing vertically are the subject for another article, but suffice it to say that you can at least double or triple your yields by growing vertically.
6. And you only need container frames 8″ high. If possible it’s good to set them on existing soil, so your plants’ roots can go into the native soil and get additional nutrients, but it’s not necessary. You can even grow healthy plants on a driveway, deck, or even a flat roof! Remember you’re feeding them everything they need with the natural mineral nutrients.
Good Growing!